Are you ready to make yourself a cute dress? A few of you have already posted photos to the SewLisette Flickr group and they look great! I wore mine for the first time yesterday and received lots of compliments. It’s a fun dress to sew, too.
Here’s the itinerary for the week:
- Day 1 (today): Full (or small) bust adjustment and interfacing.
- Day 2: Assemble the front bodice.
- Day 3: Add the midriff and (optional) ties.
- Day 4. Construct the back bodice and the sleeves.
- Day 5. Add the skirt, sew the zipper, and finish the dress.
Let’s start with the full (or small) bust adjustment for those of you who have requested it. This is a really easy change to make.
Full Bust Adjustment
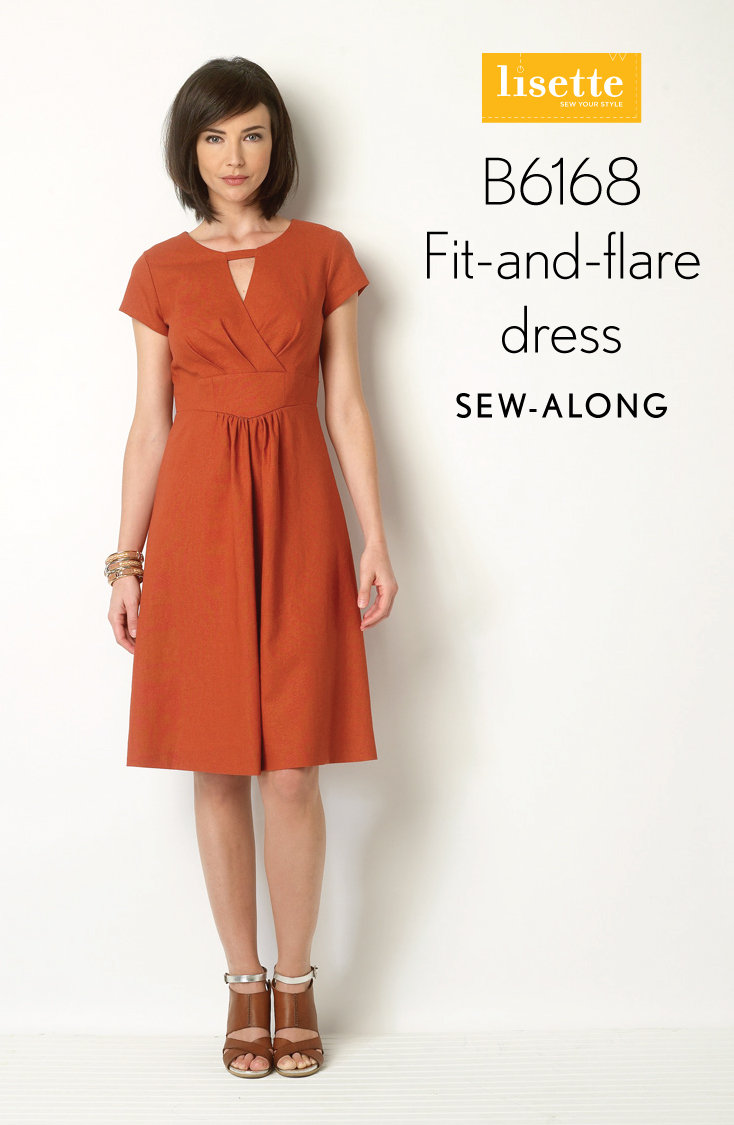
1. Mark the pattern. Begin by drawing in the 5/8″ seam lines on your pattern piece. Hold the pattern piece up against your body (be sure you’re wearing a well-fitting bra!) and position the side seam and shoulder seam against your body so you can check the placement of the apex. The apex is marked on your pattern piece with a cross inside a circle. If your apex is the fullest part of your bust (not necessarily your nipple!). Mark your own apex placement on the pattern and use that marking instead of the apex marking on the pattern if there’s a difference.
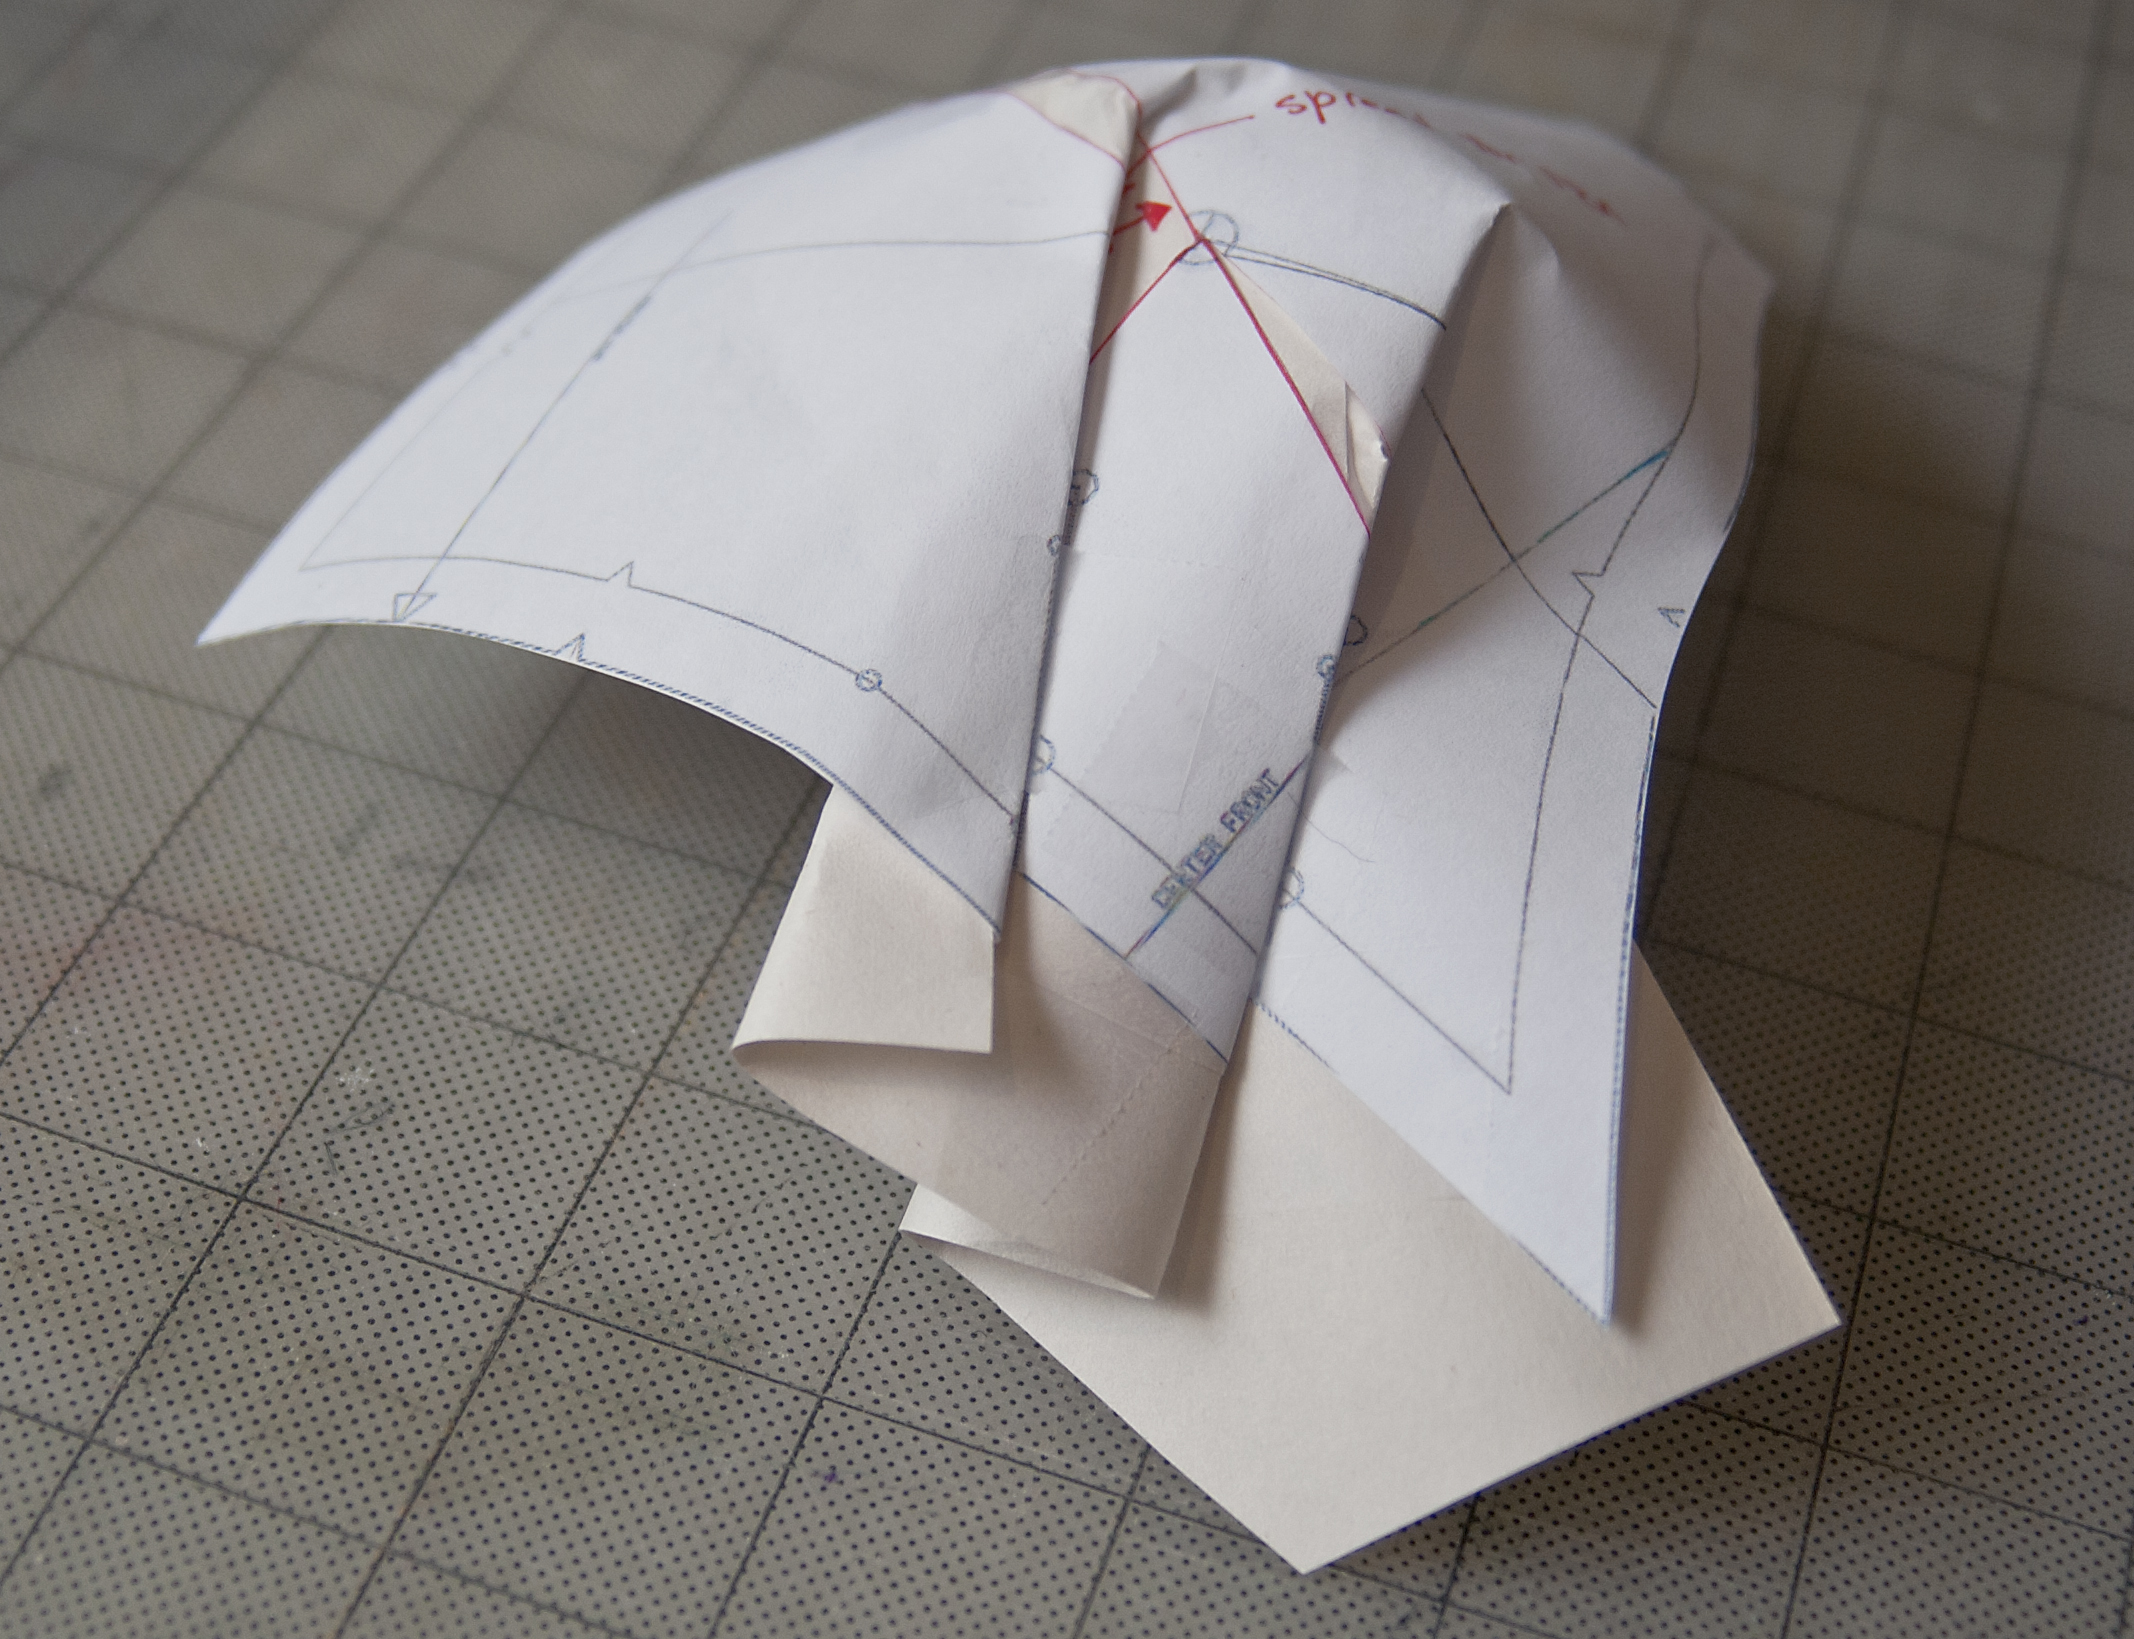
2. Draw a line from the notch at the armhole to the apex of the pattern. Draw a line from the apex to the center line of each pleat, as shown.
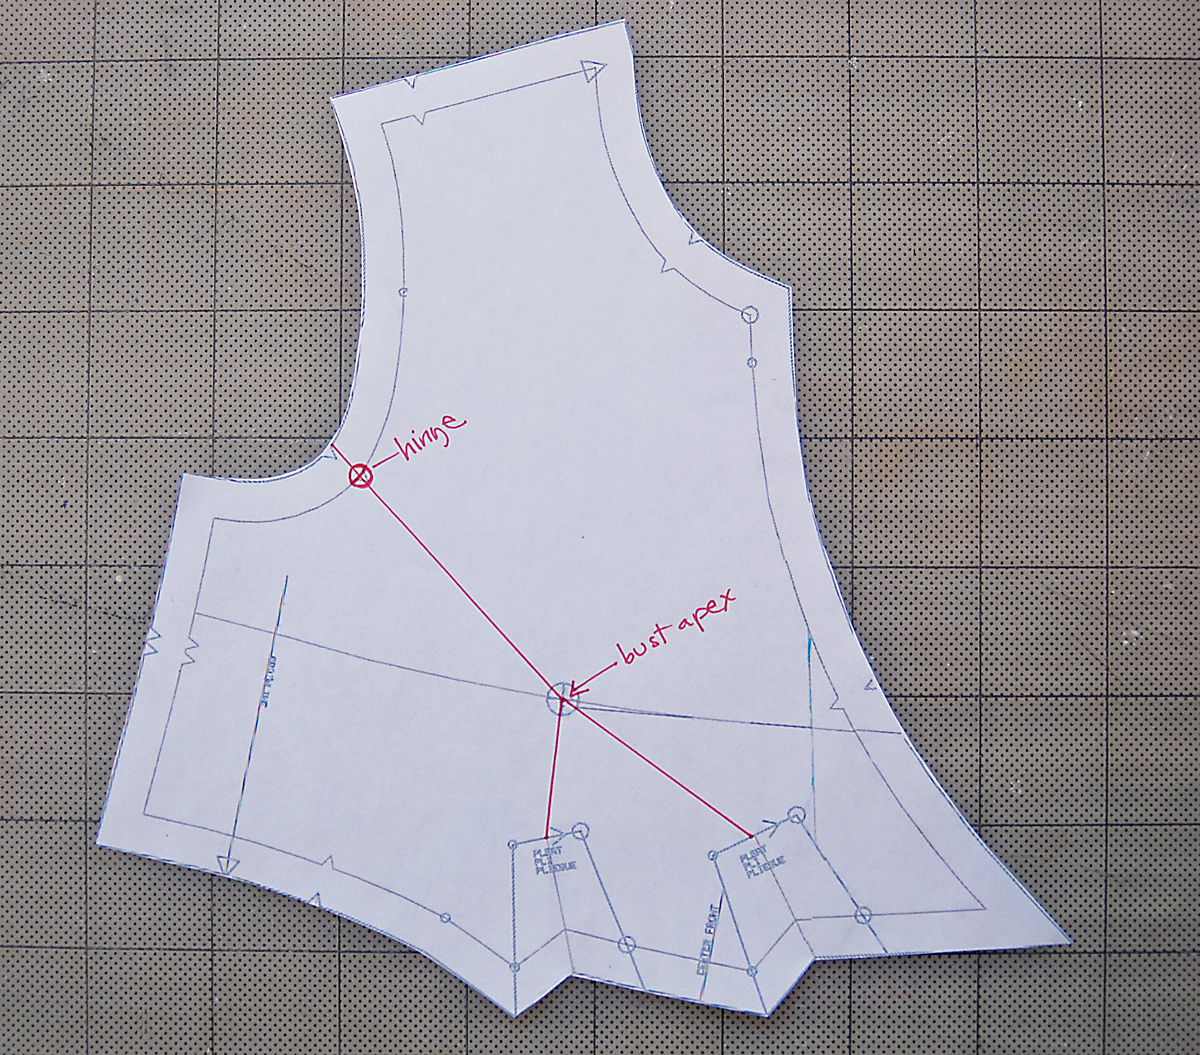
3. Cut along the center line of each pleat, pivoting to cut up the line to the apex. Leave a small hinge of paper at the apex itself as shown. Continue cutting from the apex to the notch at the armhole, leaving a paper hinge at the seam line of the armhole, as shown.
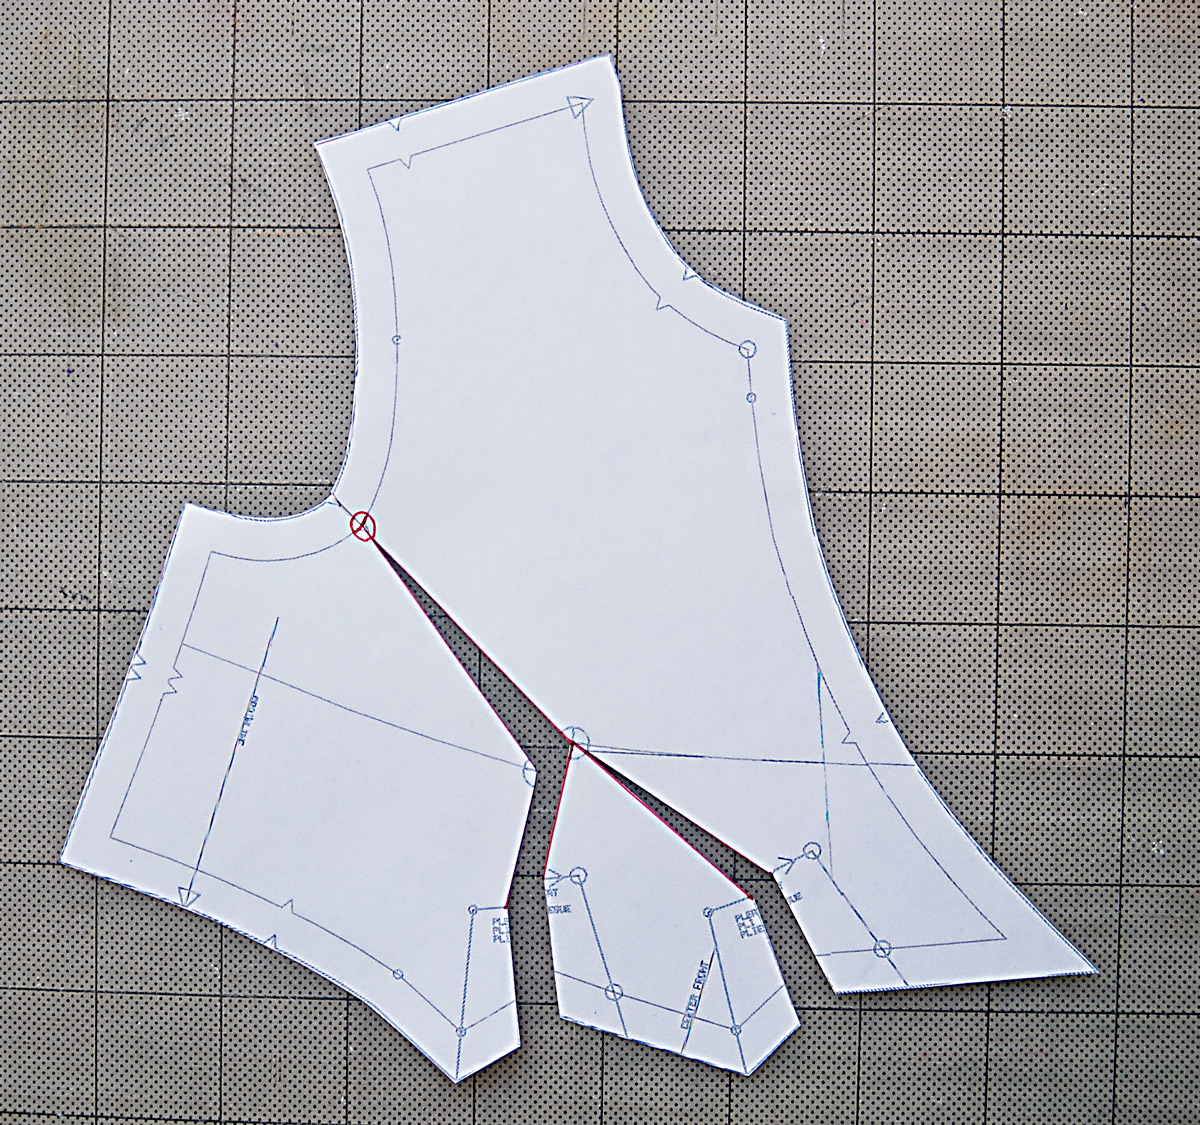
4. Spread the paper pattern apart at the apex. If your measurements indicated that you’re a C-cup, spread the pattern by 1/2″. If you’re a D-cup, spread by 3/4″. If you’re an A-cup, you can slide the pieces of the pattern to overlap each other by 1/2″ instead of spreading.
As you spread the pattern at the apex, the pleats will also get wider (or smaller if you’re overlapping for a small bust). Divide the amount of spread evenly between the two pleats by pivoting the flap of paper in the center, and tape a piece of paper behind the pattern to hold everything in place as shown. Leave some paper at the bottom edge of the pattern piece as well, so the lower edge can be adjusted in the next step.
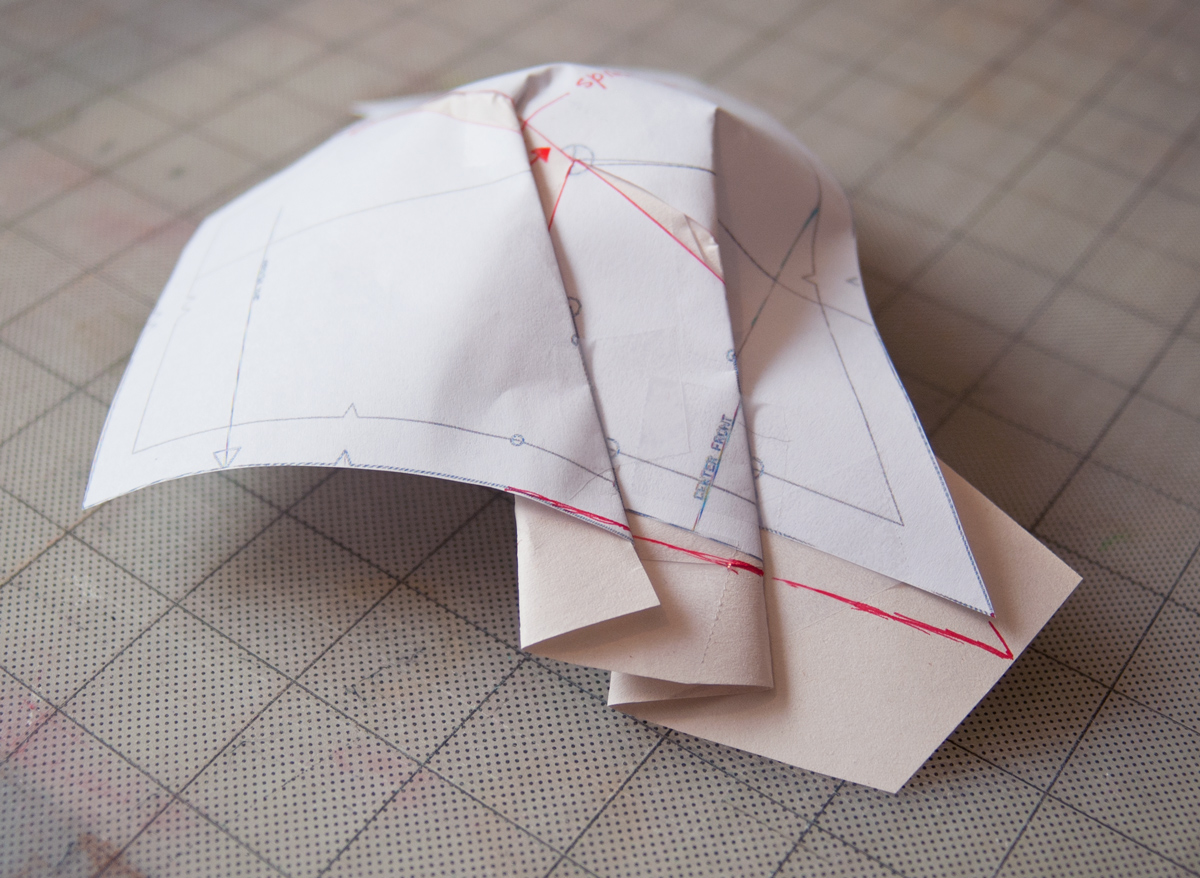
5. Once you’ve taped paper to fill in the gaps, carefully fold and tape the pleats together. Note that the pleats will no longer match up at the bottom edge. See how the dots don’t match anymore? That’s okay. Tape the pleat edges together for the time being so we can adjust the lower edge of the bodice and re-position the pleat dots.
6. Since we added length to the outside of the front bodice when we spread it at the cut, we’ll need to add the equivalent amount of length to the rest of the bodice. And then we’ll re-mark the dots that match up the two edges of each pleat. Start by drawing a curved line that mimics the curve of the bodice but drops down a bit. Blend the lines a bit as you draw the new curve, as shown below. (If you’re reducing for a smaller bust, you’ll be shortening the bottom edge of the bodice near the center front instead of lengthening it.)
7. Then, keeping the pleats folded, trim the bodice at the new bottom edge.
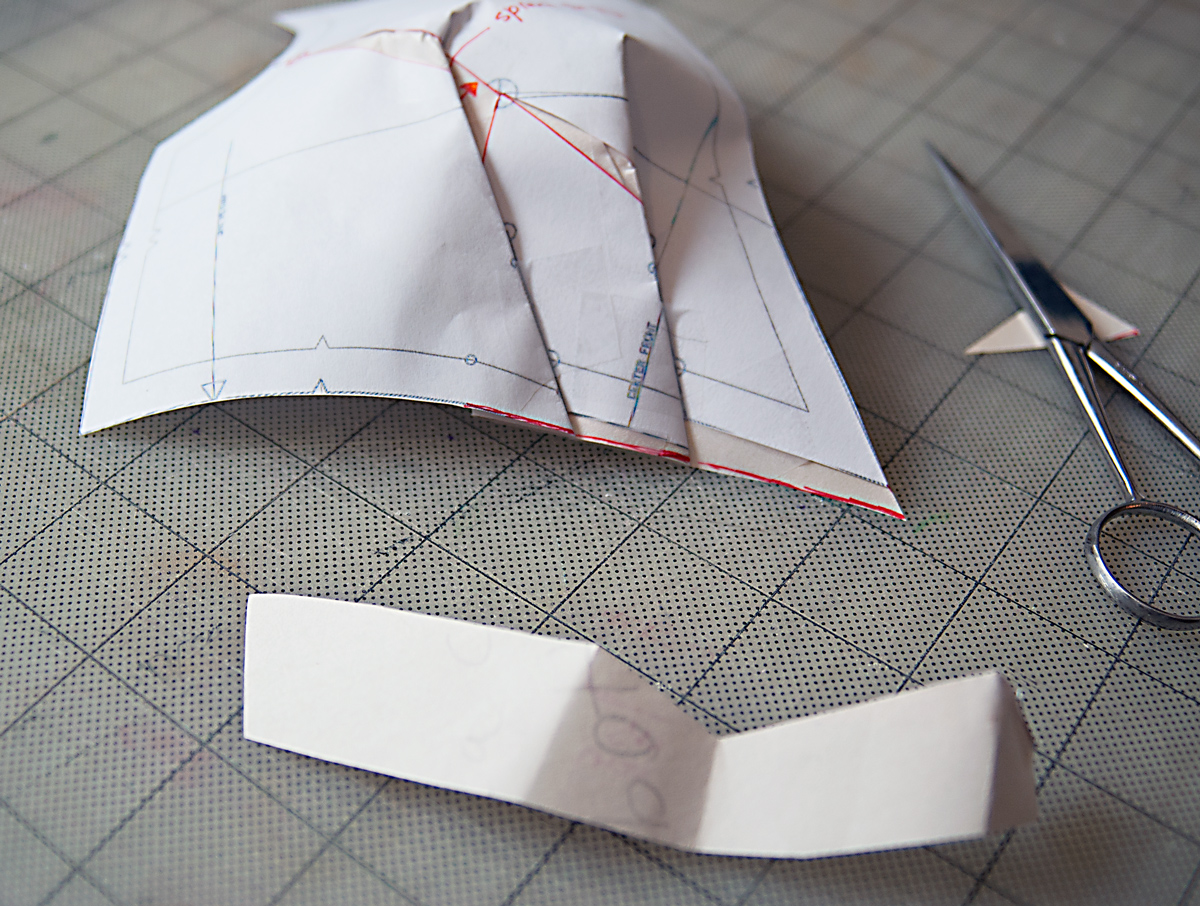
8. The result, when you un-tape the pleats, will be a new pattern piece that’s wider and longer to accommodate a fuller bust, with the pleat uptake adjusted as well.
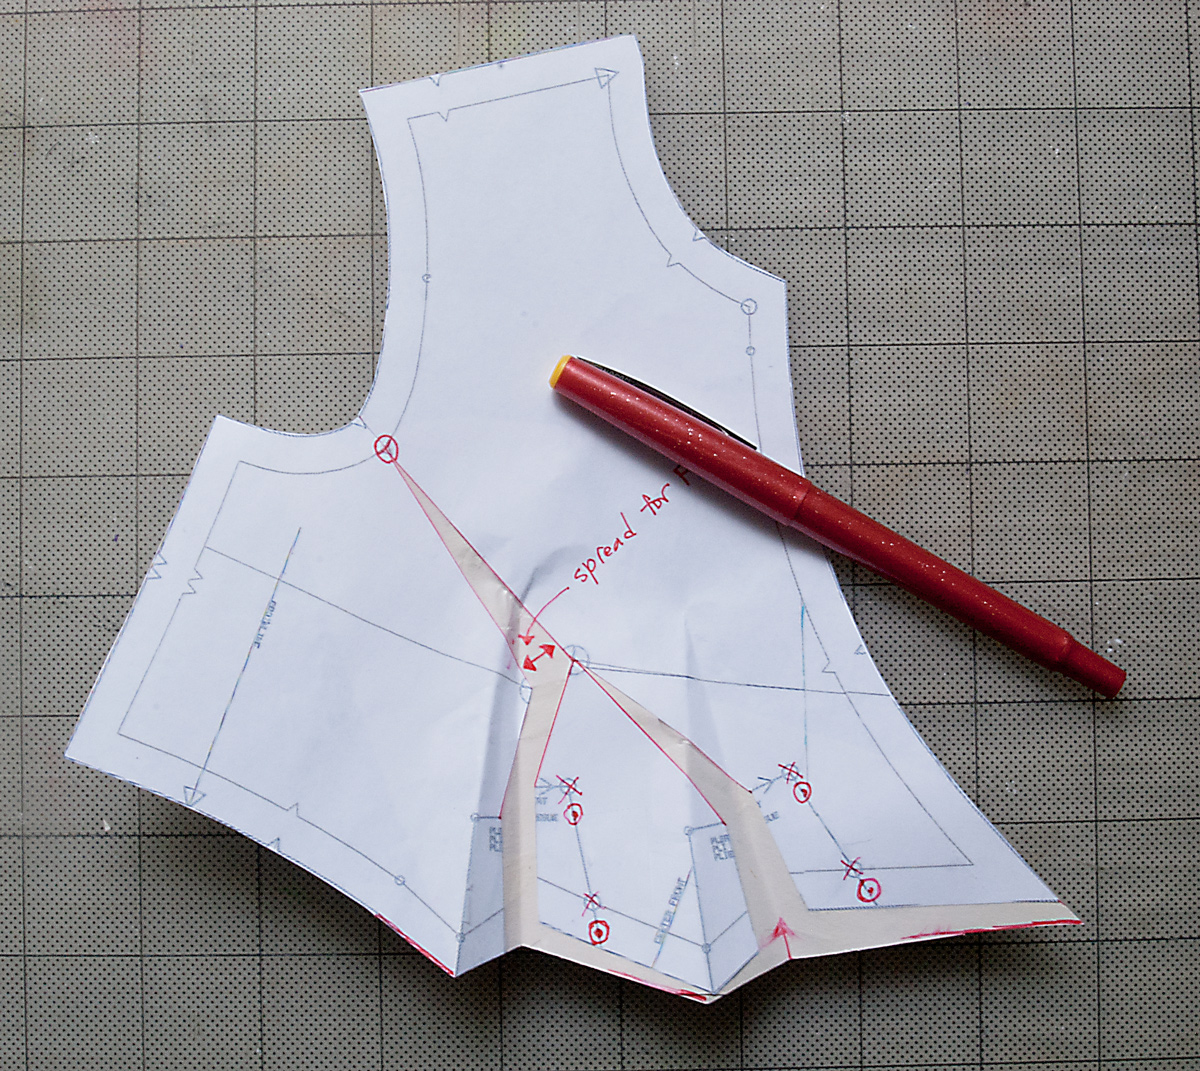
And now you’re all set, with a new and improved pattern piece! Be sure to check the fit by making a muslin so you can do any further tweaking to customize the fit.
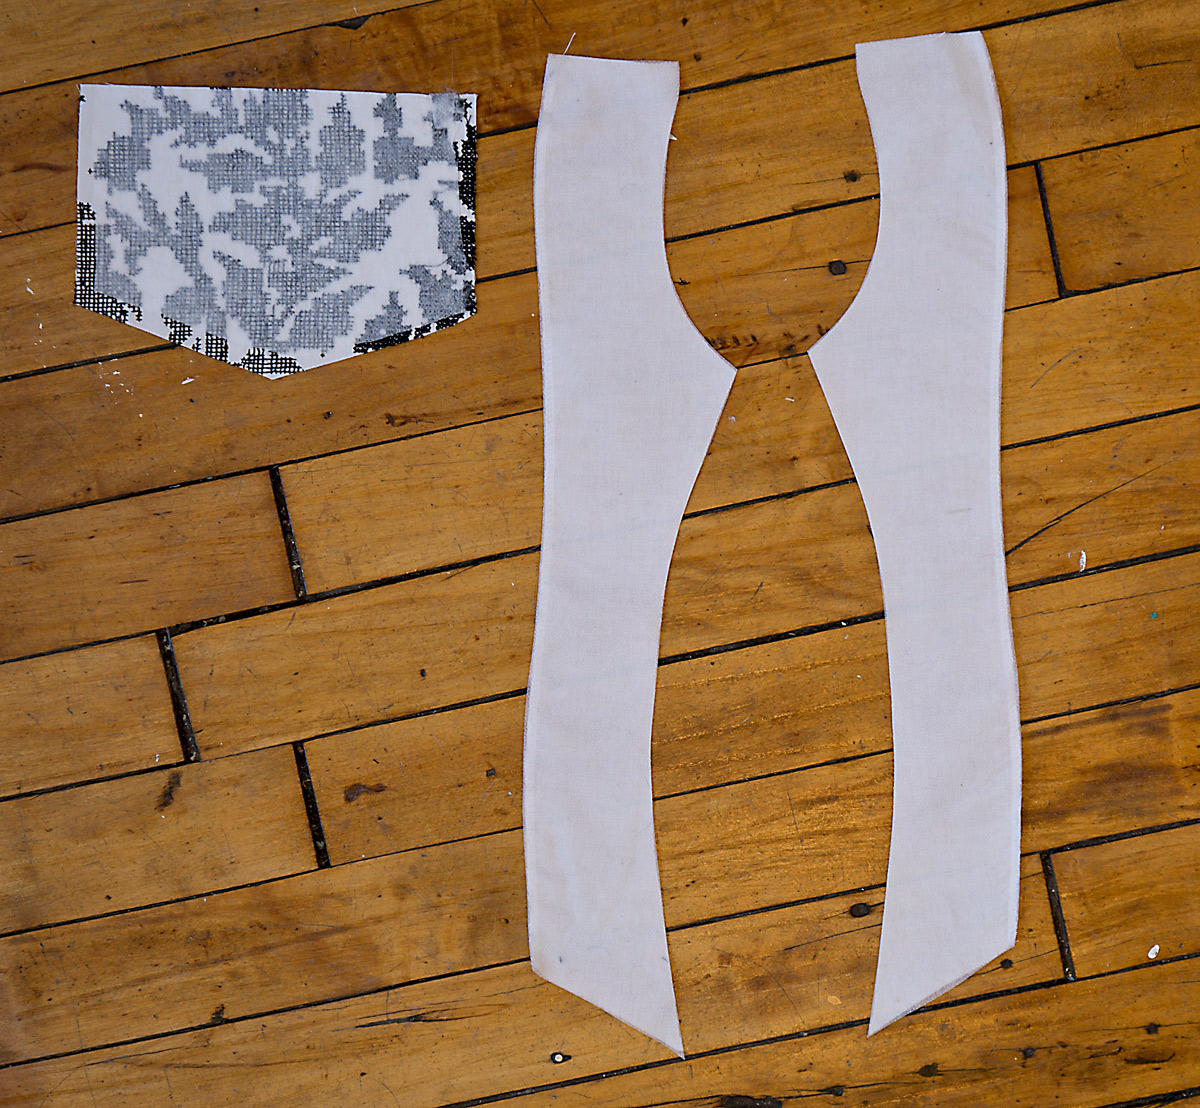
Once you have your fabric cut out and all your markings transferred from the pattern pieces, you’re almost ready to start sewing. We just need to add a little interfacing to a few pieces.
Interfacing
1. Trim corners of INTERFACING, as shown. Fuse interfacing to wrong side of each matching FABRIC section, following manufacturer’s instructions. (Note: I trim some of the interfacing from most of the seam allowances, not just the corners. It’s just a matter of personal preference; do as you see fit here. Also note that the facings for my dress are plain white lawn to prevent any show-through on my white dress fabric.)
And tomorrow we’ll get started with the actual sewing. That will give everyone who wanted to do the Full Bust Adjustment a little time to get caught up with us. I’ll see you tomorrow, right here!
Continue along to Day 2 of the sew-along.


12 Comments:
OK, so I’m going to ask what is probably an obvious question-where do I find the chart that tells me how much to add for my cup size?
Colleen, I listed the amounts in Step 4. I hope that helps!
So if I’m a DD then I add a full inch-got it, thanks!
i love this dress but I’m a g cup will it go that big? With a fba?
Tracey I’ll bet with this adjustment it will. It’s a lot easier to do than it looks, and the pictures explaining the steps are spot on. I’m just a DD so I added an inch, and I think I’ll probably have to add a bit at the side seams on the waistline piece as well so that the high waist fits, so it should all work out.
If this helps, I used a Dritz “Styling Design Ruler” to mirror the slightly curved lines on each side of the bodice point, both under the pleats and on the center front edge.
Hello!
I’m already to make this dress and am a bit stumped by pattern sizing.. I typically wear a Size 4, but according to the pattern measurements I should be making a Size 10 or 12? Does that make sense?
Bust- 33
Waist- 27
Hip- 36
Thank you so much for this FBA tute. Would the measurements in step 4 be the same for all your patterns? I love love love the smocked black linen tunic that you made from your pattern Simplicity 2059. I want to try and make it but have been to intimidated because I know the pattern will not fit without some major adjustments. Making pattern adjustments it what always holds me back. Again thank you for showing the full bust adjustment.
Patty, this FBA is different than most because of the pleats. I’ve done a standard FBA with a side dart as a CreativeBug video, and all our Liesl and Co patterns include FBA instructions, so you could also refer to those if you want to adjust the dart on that particular pattern.
Thank you for your quick response…4 minutes that’s a record:) I am so jazzed about trying to make an adult garment again.
Thank you so much for providing a tutorial for small busts as well. I am always stumped as to how to adjust the bust area, and have had a difficult time finding tutorials for SBA, so this is a welcome tutorial!
My pleasure, Emi! For future reference, you can always use the regular FBA instructions, but slide the pieces together instead of spreading them apart. Cheers!
Laura, sorry for the delay–I’m travelling this week. Yes, pattern sizing is very different from current ready-to-wear sizing. I wrote a post explaining this recently: http://www.sewlisette.com/blog/2015/03/finding-your-sewing-pattern-size/ I hope that helps!