Welcome back to Day 4 of the B6168 Lisette Fit-and-Flare Dress sew-along! If you’re just joining us, I would recommend starting at Day 1 and following along from there so you don’t miss anything.
Today we’ll be constructing the back bodice, sewing the back and front bodices together, and adding the sleeve. Let’s get started, shall we?
Bodice Back
21. Stitch dart in BODICE BACK (7). Press fold of darts toward center.

22. STAYSTITCH back neck edge.
23. Fold BACK FACING (8) on roll line, wrong sides together, matching notches and triangles. Press lightly. Pin raw edges together.
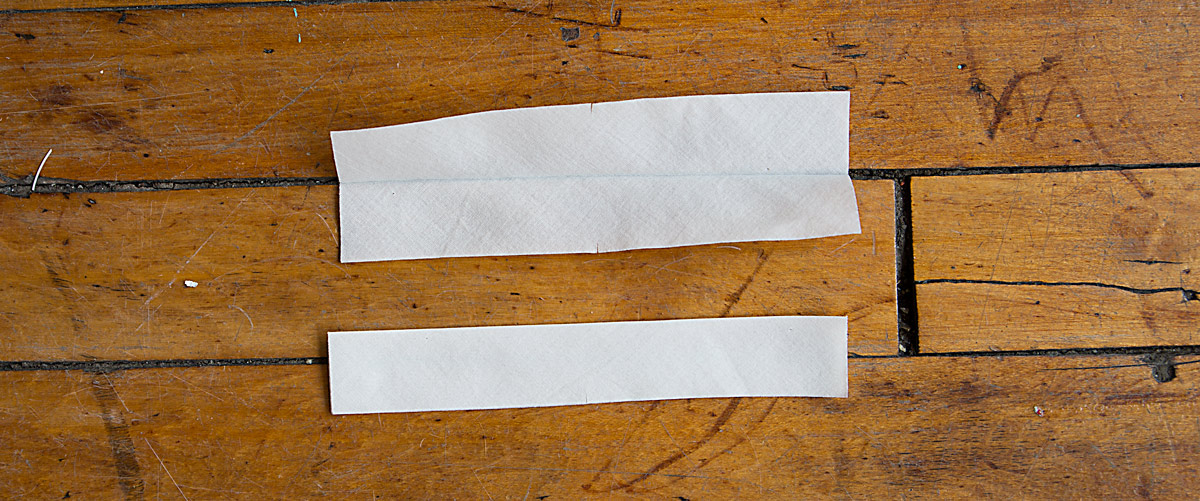
24. Pin facing to neck edge, matching notches, center backs and triangles, clipping bodice neck edge where necessary. Stitch. Trim seam allowances.
25. Turn facing to inside. Press. Baste close to fold.
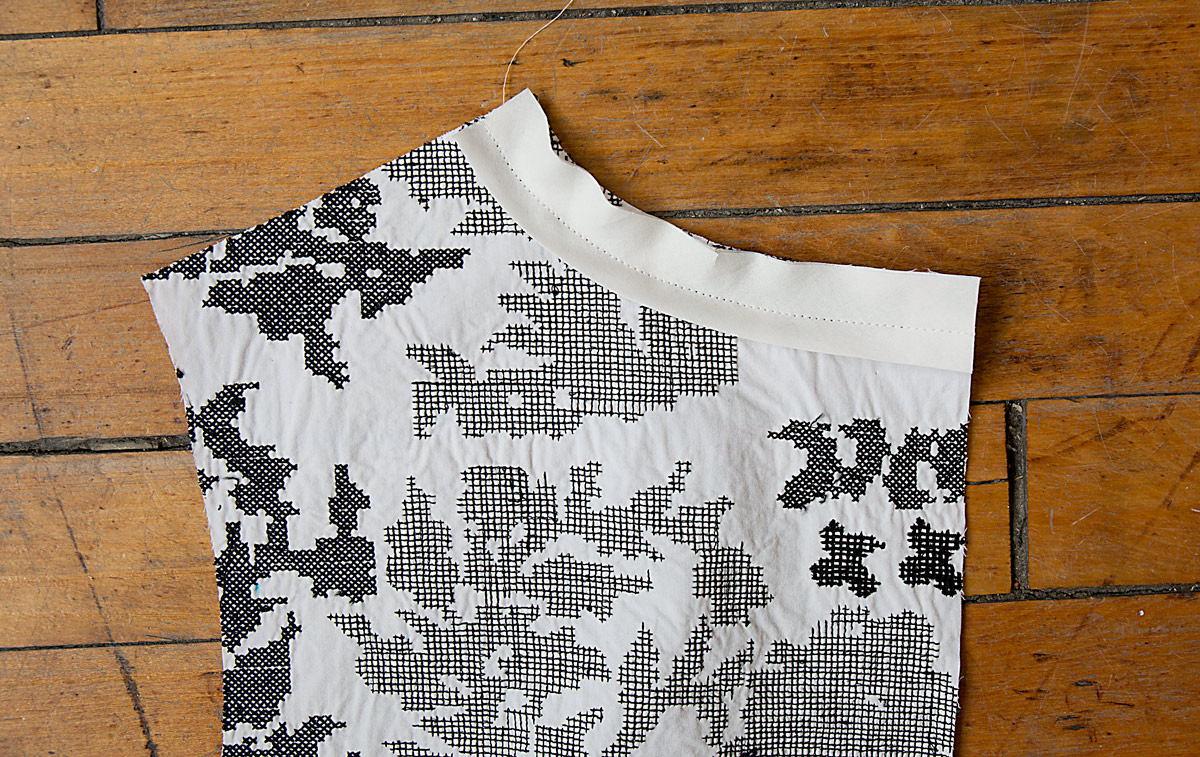
26. On outside, stitch back along basting. (Once you’ve stitched the facing you can remove the basting stitches, which just help to serve as a stitching guide. I love a dainty little bias facing like this. It’s such a simple but elegant way to finish an edge. And I really love the next step when we sew the shoulders. It gives such a clean finish to the inside of the dress.)
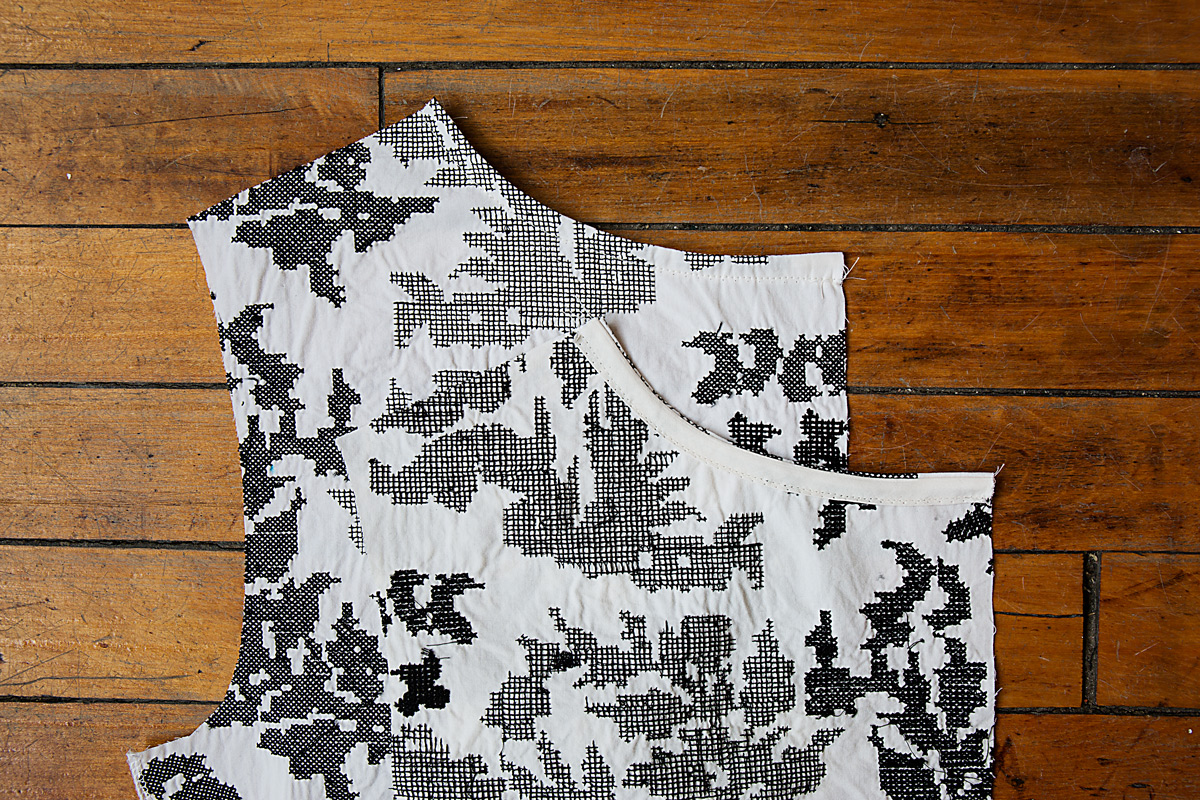
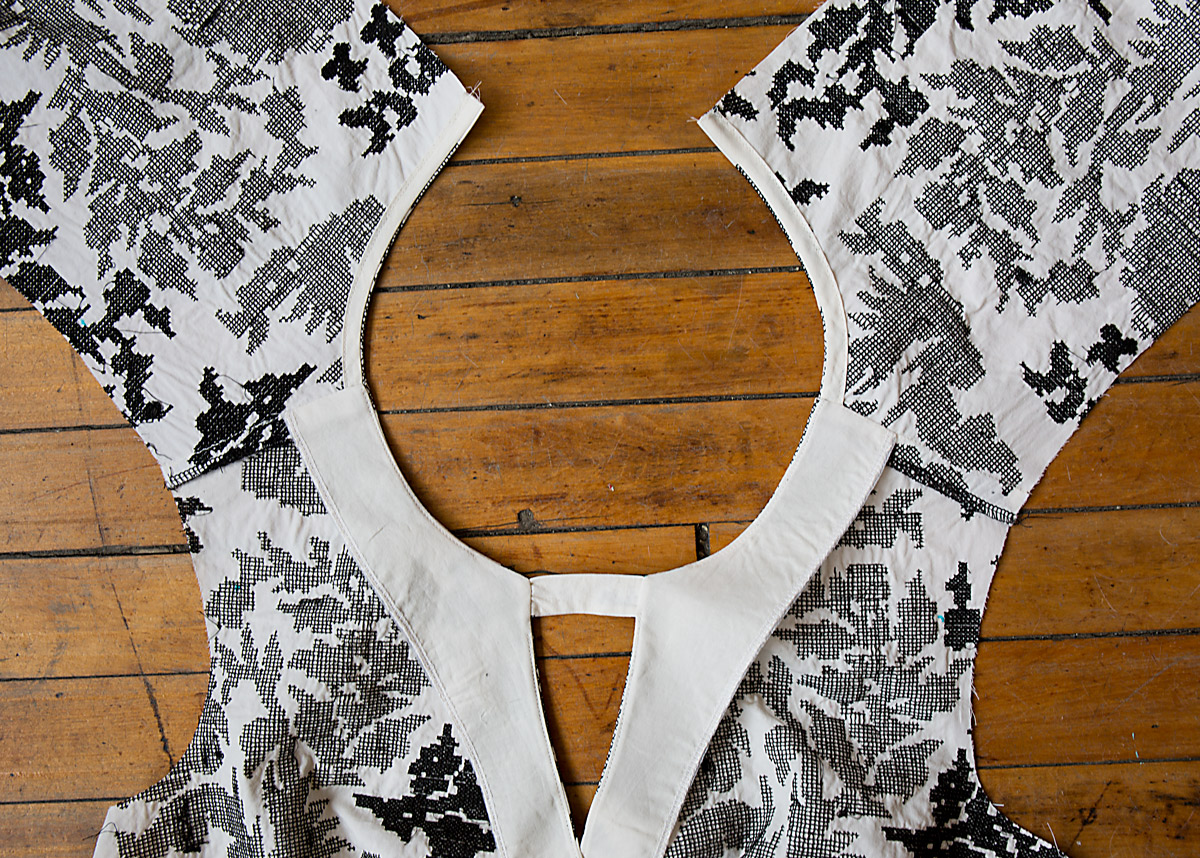
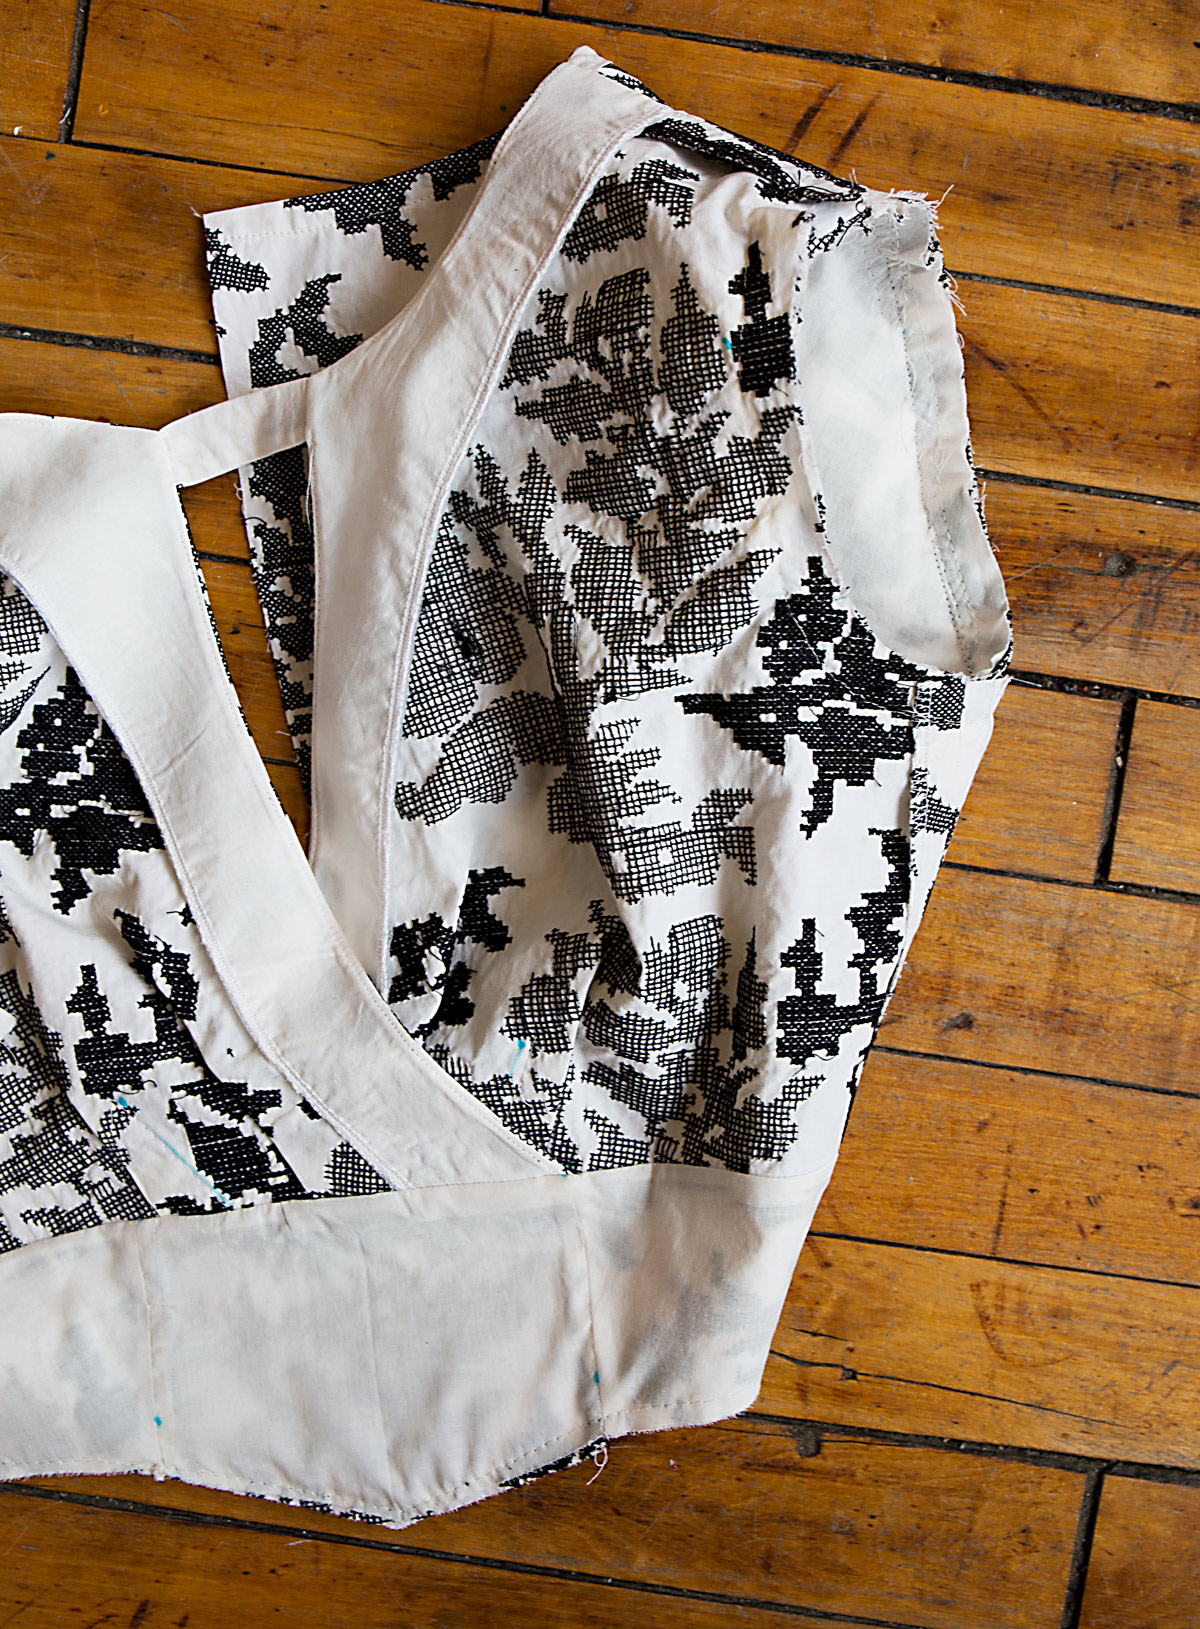
27. Open out front facing at shoulder edges. Pin bodice back to bodice front at shoulders, right sides together, matching notches and back neck edge to facing seam. Turn front facing to outside (over bodice back). Stitch entire shoulder seam. Trim seam allowances. (The trick to this step is to match the back neckline to the front neckline really precisely BEFORE you unfold the front facing. Then fold the facing around the back bodice very snugly and BASTE it first so you can check to be sure the necklines match up when you turn the front facing to the wrong side again. You may need to fiddle with this a bit–I re-basted one side twice before it matched up perfectly–but when it does match up it looks great and you can go back and sew it with a regular stitch.)

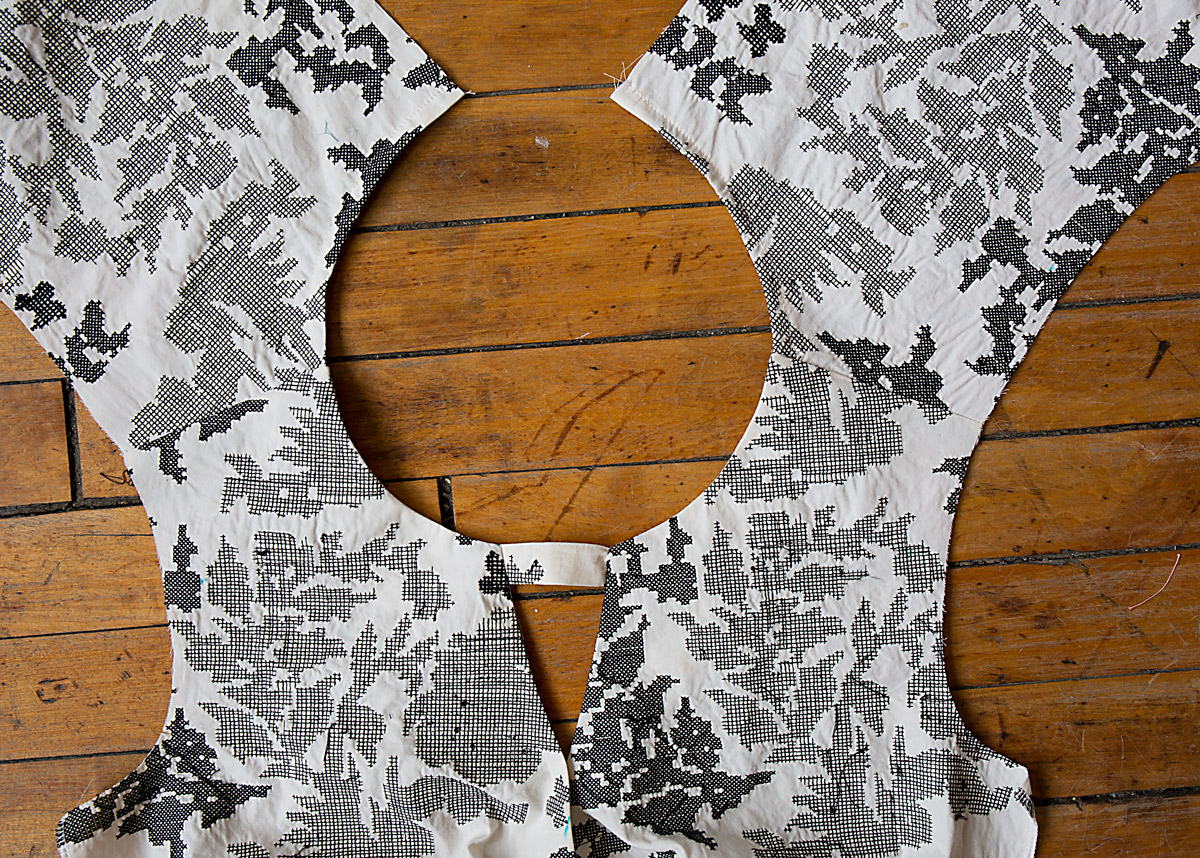
28. Turn front facings to inside again, turning shoulder seam allowances toward front. Tack facing to shoulder seams. (See that nice, clean neckline? And the facings look so neat when they’re done this way.)
Sleeve
29. Stitch seam of each SLEEVE (9) section. (Stitch the outer sleeve and the sleeve facing. Remember that my facing is white.)
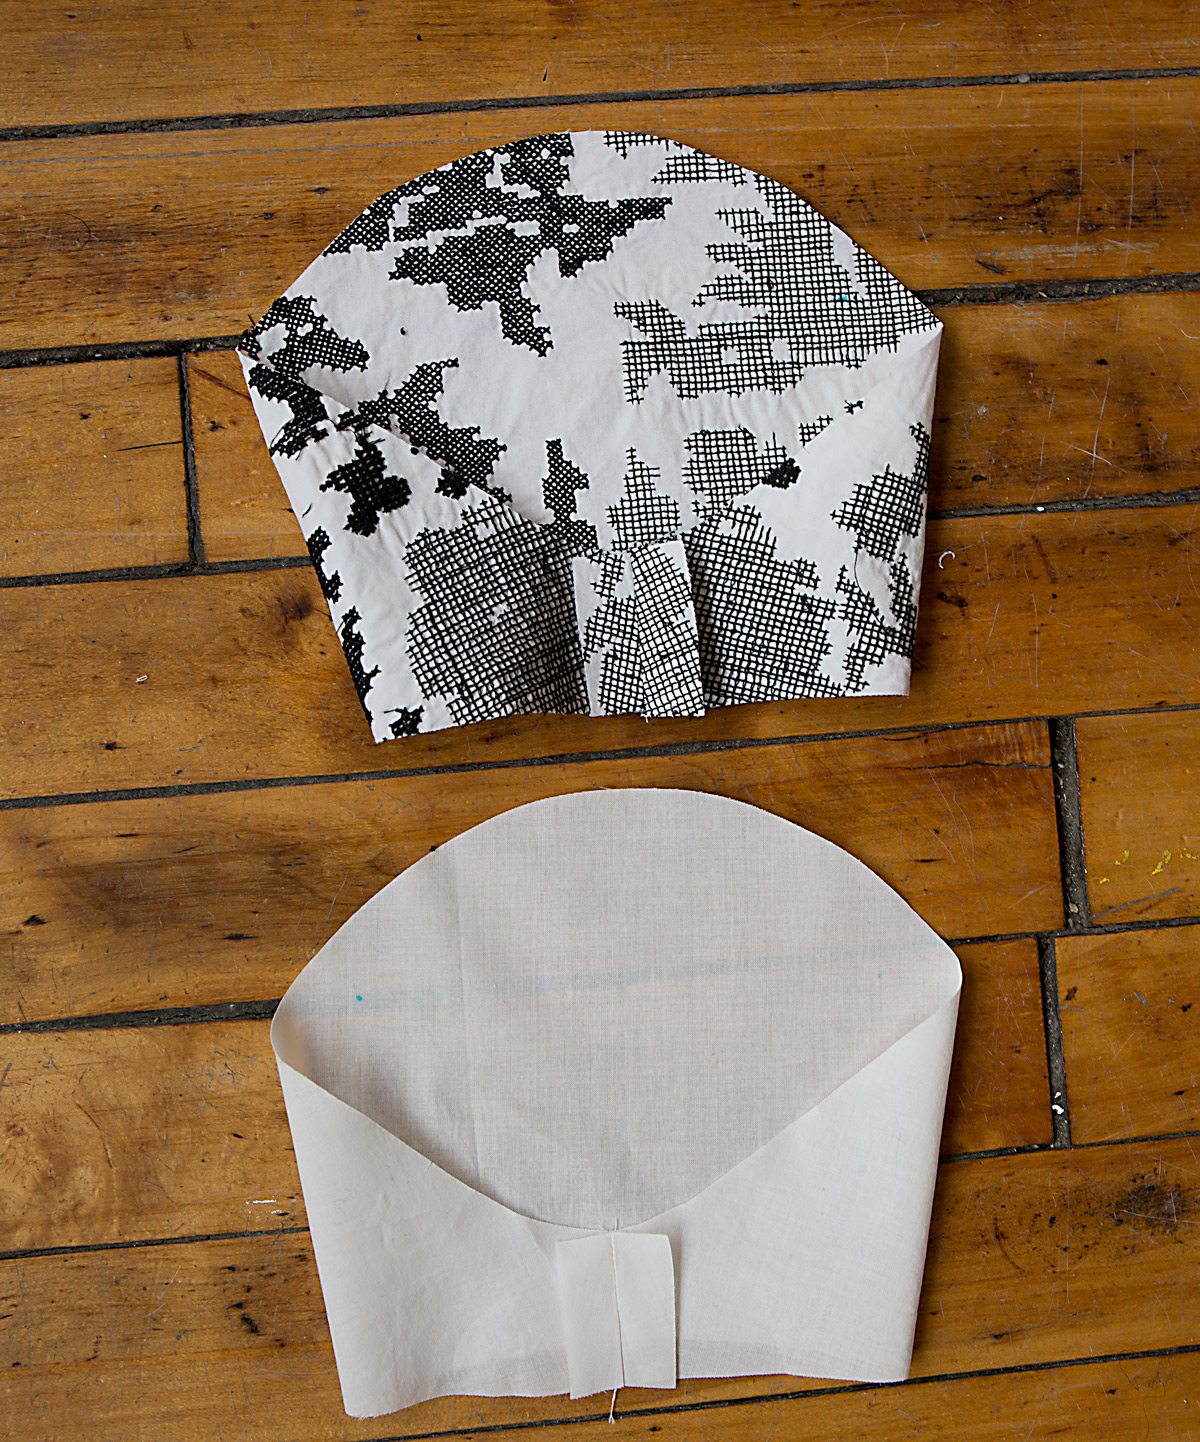
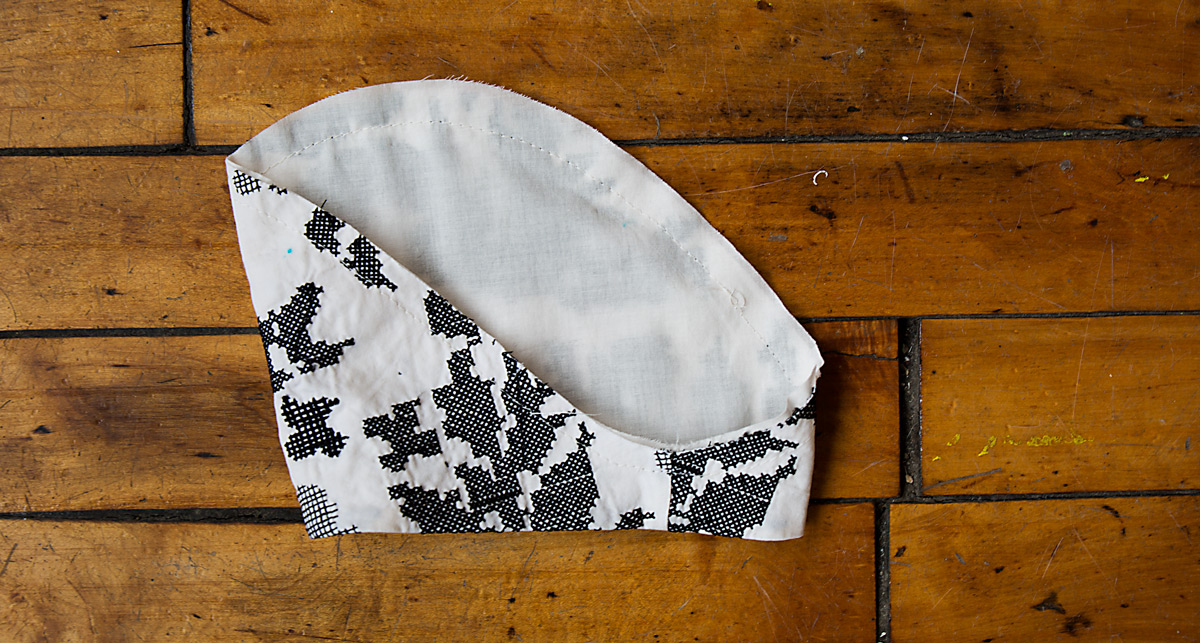
30. For each sleeve, pin two sleeve sections, right sides together, matching seams. Stitch lower edge. Trim seam allowances. (I trimmed my seam allowance to about 1/8″. Then press the seam allowances toward the facing side to prepare for understitching in the next step.)

31. UNDERSTITCH one sleeve section. (Understitch the sleeve facing.)
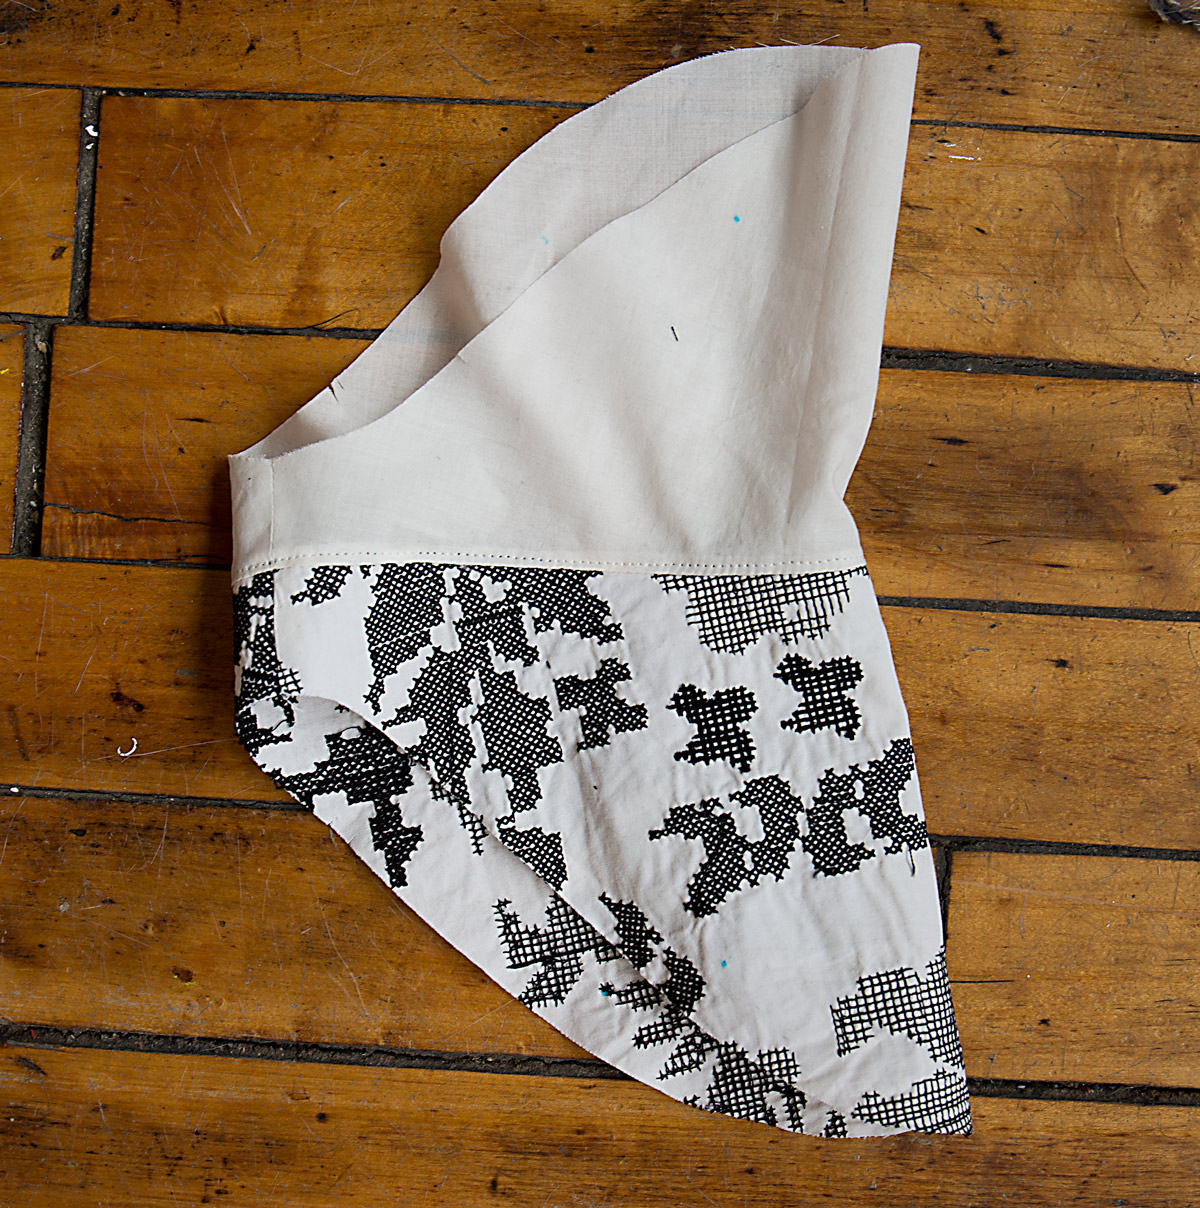
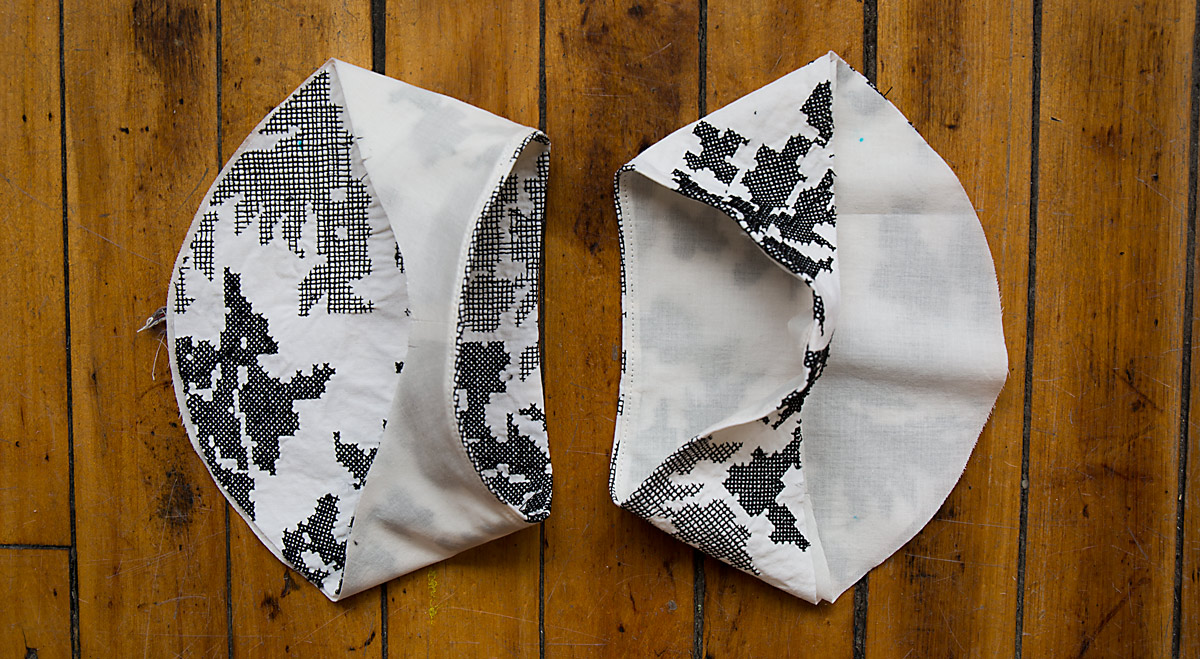
32. Turn facing to inside. Press. Baste raw edges together. (See? A nice, lined sleeve with no visible seams when it’s finished! I showed you one right-side out sleeve and one inside-out sleeve because they’re both equally neat and clean.)
33. EASESTITCH cap of sleeve between small circles. (As usual, I easestitched with a 1/2″ and a 3/4″ seam so my rows of easestitching are on either side of the 5/8″ seamline.)
34. With right sides together, pin sleeve into armhole edge, matching notches, underarm seams, small circles and large circle to shoulder seam. Adjust ease. Baste. Stitch. Stitch again 1/4” (6mm) away in seam allowances. Trim close to second stitching. Press seam allowances flat. Turn seam allowances toward sleeve. (I know, sleeves can be such a pain to insert smoothly. Here are a few tips: be absolutely sure the notches are matching up. If they aren’t, you’re probably adding even MORE fullness to the cap of the sleeve, which will make it really difficult to ease in the fullness. Also, I find that it helps a lot to hand baste the sleeve into position so I can control the fullness and it doesn’t shift around then I machine stitch it. And finally, machine stitch the sleeve with the sleeve itself facing down against the feed dogs on your machine. The sleeve WILL fit the armhole, I promise; sometimes it just takes some patience and a little fiddling. And sometimes a glass of wine.)
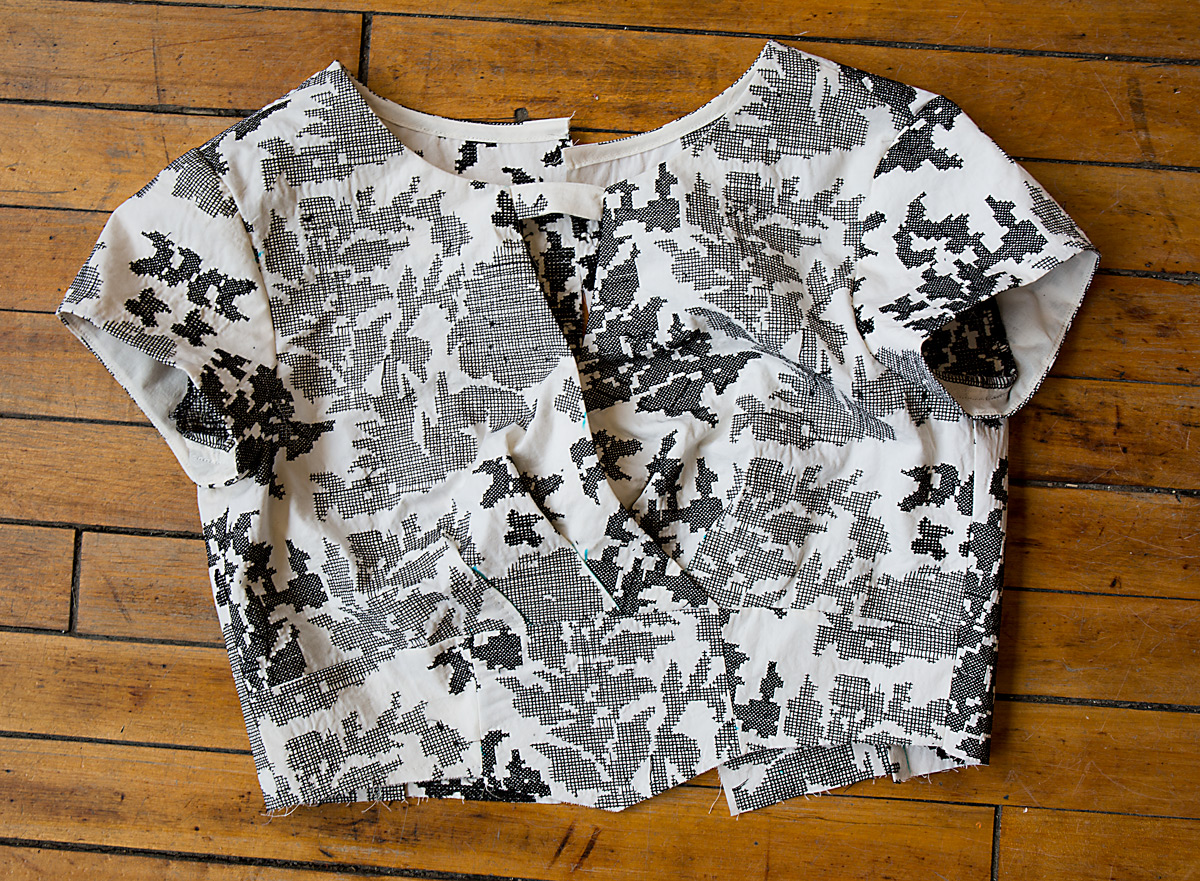
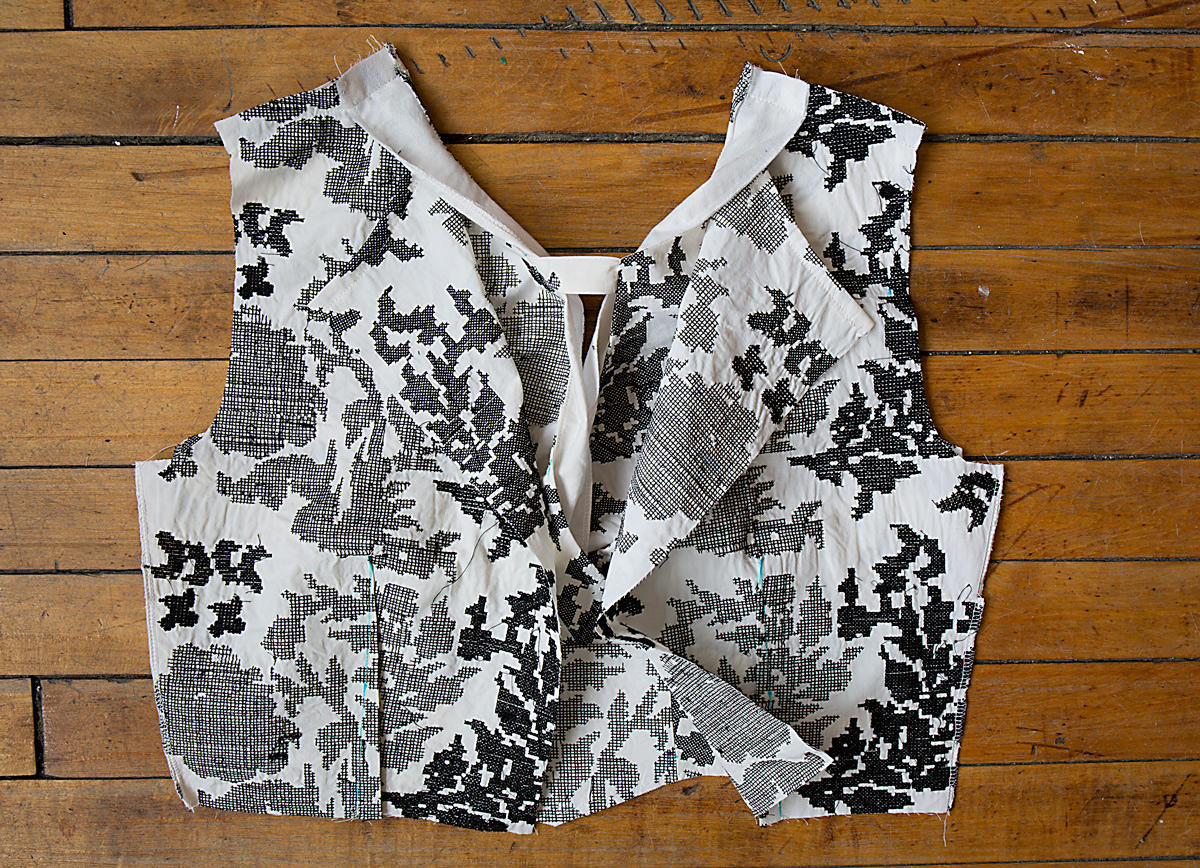
Look, a finished top of the dress! We need only to add the skirt and the zipper before we finish it. I’ll see you here again tomorrow.


6 Comments:
The finish work on this is GORGEOUS! I’m still stuck back at day one for a variety of reasons that could really only happen to me, but I can hardly wait to get this finished! I’m working on a muslin to get the fit just right before cutting into my fabric, which was your absolutely wonderful suggestion and I’m glad I took your advice.
I love this dress! And I am hopelessly behind in the sew along. I want to wear this to my daughter’s christening in two weeks but need to make it nursing compatible. Would that be easy or would it through the whole look out? I was thinking of making easy closures at the waistband but need to look at the pattern to work out if it could actually be done or not. Any ideas Liesl?
Did I miss where we were supposed to see up the side seams on the bodice? I am not seeing it here, nor on the written pattern directions. :-/
*sew up the side seams, that is.
Agree with Kerri, there is no mention of the side seams. The picture in the pattern shows them in 28. That’s where I am right now! Guess I’ll do them.
I’m not seeing it mentioned either! It should be at step 28, you’re correct. I’ll let them know so it can be corrected for reprints; thanks for pointing that out!